Expansion Converter
Description
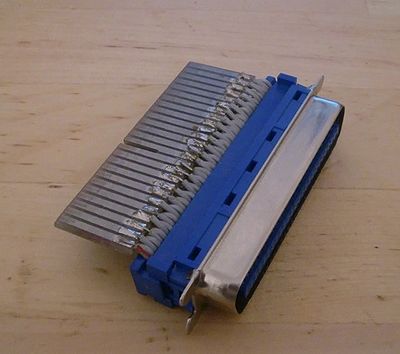
The project will allow you to connect Amstrad (UK edge connector) interfaces to a Schneider (Centronics Connector) CPC.
What You Will Need
- 1x 50way Centronics Connector
- 1x PCB 1.5mm Thick - 35µm Copper coated on both sides
- 1x 3-4cm of 50way ribbon cable.
Tools: A hacksaw and soldering iron.
Construction
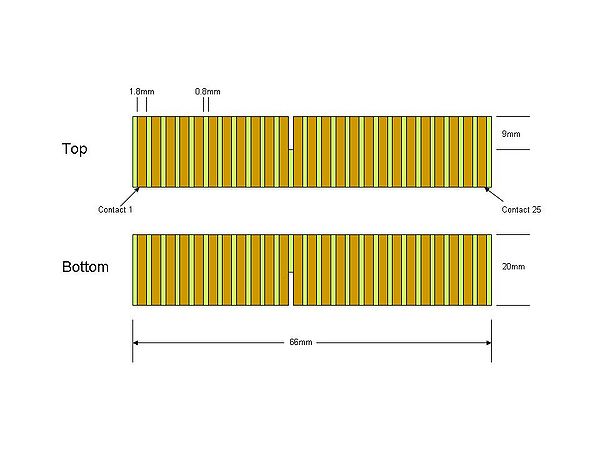
Cut a section off the PCB 66mm long and 20mm wide and mark both sides as shown in the diagram below. Each copper track must be 1.8mm wide, the spaces between the tracks should be 0.8mm wide. To achieve this, simply measure and mark the lines where spaces should be and then carefully use the hacksaw to cut the spaces into the copper until the PCB material is visible. When all the spaces have been cut (top and bottom), a slit for the divider must be cut between the 11th and 12th track (looking from the top and counting from left to right). This slit should be approximately 9mm deep.
When the PCB is complete, take the ribbon cable and separate the wires from each other for the first 10mm. Then strip the first 5mm of isolation off each wire. Starting with wire one (usually marked red or blue) solder this wire to Contact 1 (See diagram) then solder the second last wire to Contact 25 (doing this ensures that the ribbon cable is soldered parallel to the PCB), then continue to solder the other wires where they belong. Top side will be the un-even numbered wires (ie: Wire 1,3,5,7,9,.......49) The bottom contacts will be wires 2,4,6,8, etc.
When all wires have been soldered, place the other end of the ribbon cable into the Centronics connector with wire one on the right (looking at the rear of the connector). Ensure the wires are aligned properly before pushing the connector closed. It will be impossible to fully close the connector with your hand, I recommend using a vice to completely close the connector.
Ensure that there are no short-circuits between any of the tracks or connecting wires before connecting the adapter to your CPC !!!
Dimensions
Bryce

