DIY 464 External Audio Socket
Description
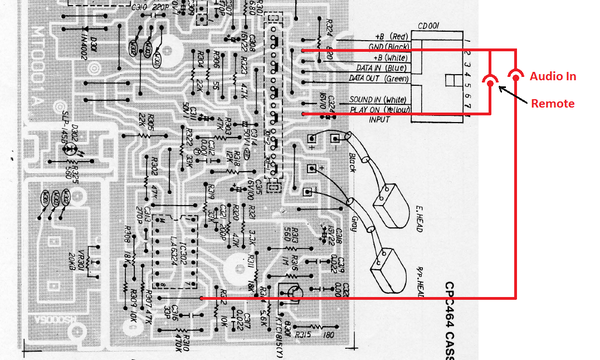
The connection diagram below will allow you to connect an external CD Player or other audio device / PC soundcard to a CPC464 which will then act as a tape input.
The connector CD001 is the flylead connecting the datacorder circuit to the main PCB.
If you're getting errors while trying to load or save files, you can find the error code descriptions here: Read Error Codes
Alternative:
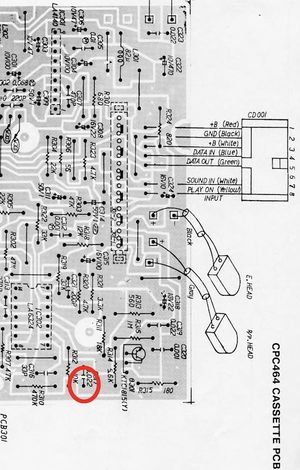
According to Noels Retro lab Youtube video, it can be better to connect the signal to C317 instead of R307.
Second method
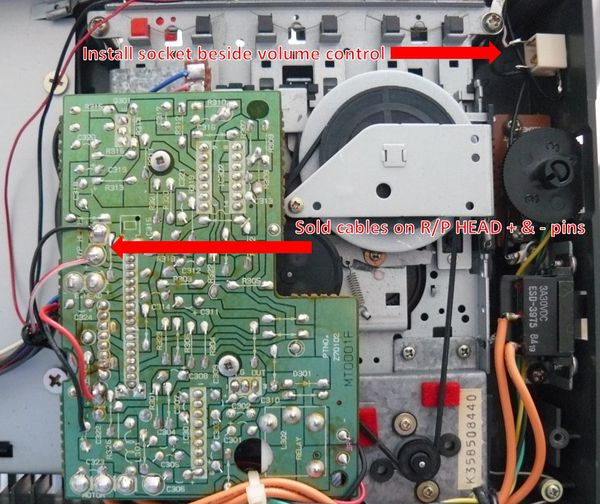
In my case, I don't know why but the first method described above didn't work. Maybe because my Amstrad CPC464 is from the second revision, although the cassette drive seems to be the same. What I did is just connect the new "audio in" 3.5 mm mono jack socket directly to the cassette tape head, as shown in the picture below. Very important: be careful with the polarity. Don't forget to connect the chassis to ground/black cable and the main contact to signal/red cable.
Then, drill a 6 mm hole on the case to hold the new socket.
If everything is OK, now you can load CPC games from an Android mobile using an app called TapDancer Virtual Datasette and don't need to convert .cdt files to MP3 anymore.
Things that you may need for this DIY:
- 3.5 mm mono jack socket
- 2 cables (red and black)
- 6 mm drill bit for metal and drill
- Soldering iron and tin
- Continuity tester


