(→Enclosed Micro-Switch Joysticks) |
|||
| (4 intermediate revisions by one other user not shown) | |||
| Line 37: | Line 37: | ||
| − | Check each pod individually on a table top, that they still click when you push them. If one is broken, you can always swap it with one of the fire button pods (which ever fire button you don't use) to fix the problem. If two are broken, you might have a problem, because getting replacements for these pods is more or less impossible. Be careful when cleaning these, because they're very easy to bend and once they' | + | Check each pod individually on a table top, that they still click when you push them. If one is broken, you can always swap it with one of the fire button pods (which ever fire button you don't use) to fix the problem. If two are broken, you might have a problem, because getting replacements for these pods is more or less impossible. Be careful when cleaning these, because they're very easy to bend and once they've been bent, they don't ever work properly again. |
| Line 43: | Line 43: | ||
| − | The circuit board | + | The circuit board beneath is a completely different story, you'll probably need to do some cleaning here using some contact cleaner and a cloth. Another problem that occurs often is that the pod has worn a hole through the PCB track. If this has happened, then placing the pod with a slightly different orientation should solve the problem. Don't try to fix the hole with solder, because you'll raise the height of the track and the button won't work properly at all afterwards. When everything has been cleaned, use some new tape to hold each pod in it's correct position. The pods have 3 contact points and three straight sides. Make sure none of the contact points are touching the track of the centre contact. When assembled correctly, one of the straight sides should bridge the track coming from the centre contact. You can test each pod with your finger before assembling the housing again. |
| Line 56: | Line 56: | ||
When everything is cleaned and tested, you can re-assemble the joystick for a real test with your favourite game, but as I mentioned above, be careful not to trap any wires when re-assembling the joystick, the JY-2 wires can easily get trapped under the screw holes while putting the housing back together. | When everything is cleaned and tested, you can re-assemble the joystick for a real test with your favourite game, but as I mentioned above, be careful not to trap any wires when re-assembling the joystick, the JY-2 wires can easily get trapped under the screw holes while putting the housing back together. | ||
| − | |||
== Open Micro-Switch Joysticks == | == Open Micro-Switch Joysticks == | ||
| Line 102: | Line 101: | ||
| − | Inside there's a slightly more complicated micro-switch, with a two armed actuator. Be careful, because all these small parts can easily fall out and aren't that easy to get back in (assuming you've found them again on that patterned carpet where they landed). The only important bit is the two contacts on the | + | Inside there's a slightly more complicated micro-switch, with a two armed actuator. Be careful, because all these small parts can easily fall out and aren't that easy to get back in (assuming you've found them again on that patterned carpet where they landed). The only important bit is the two contacts on the left hand side. Clean these with contact cleaner and re-assemble the switch. |
| Line 114: | Line 113: | ||
Bryce. | Bryce. | ||
| − | [[Category: | + | [[Category:Input Device]] [[Category:DIY]] |
Latest revision as of 12:06, 19 December 2010
The Various Types Of Joystick
Most if not all digital joysticks will fall into one of three catagories. They will either use cheap and nasty "pod" switches or micro switches which may be open or enclosed. Certain weaknesses in the design are common to all joysticks, so the following guide will first address the common issues and then move on to the specific Joystick types and what can go wrong.
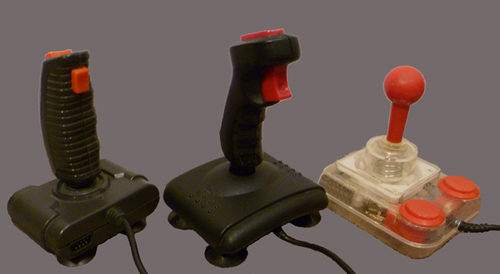
The three joysticks above cover all types. The JY-2 uses the pod type switches, the second joystick, a Quickjoy Turbo has open micro-switches and the well known Competition Pro on the right uses enclosed micro-switches.
Common Issues
The contacts used in most joystick connectors are usually cheap tin plated contacts. Over the years these will have oxidised and probably don't do the job as good as they used to, so a quick spray with some contact cleaner can't hurt.
The cable to the joystick has probably had a lifetimes worth of being wrapped around the joystick for storage and then unwrapped again for use. Although the wires are pretty flexible, they can and do break, so after opening the joystick, use a multimeter or continuity tester to check each wire individually. Not all pins in the connector are populated, but you should find a pin to match each wire on the joysticks circuit board. The wires on the circuit board side will either be directly soldered or will have push on terminals. These connections rarely have problems because there is no relative movement and they are well protected within the housing.
The soldering inside these joysticks was done by hand and it was usually terrible. Check the solder joints, especially on the JY-2 diodes and on the open micro-switch versions. As the joysticks don't have any easily damaged components, even a complete beginner can re-solder any of the joints without fear of damaging anything.
A word of warning on the wires inside the joystick: The 1984 award for good cable management didn't go to a joystick designer! In fact it's usually a complete mess in there. It is very easy to either crush a wire when putting the housing back together, or even worse, when a screw goes straight through a wire, so be very careful that no wires are in the wrong place when all is checked and finished. A well placed piece of tape is usually the safest way of keeping the wires out of harms way.
Pod Type Joysticks
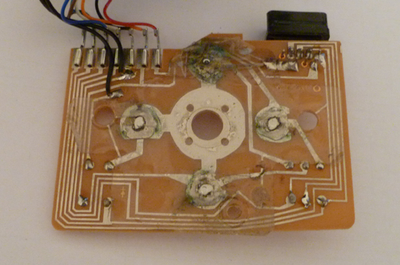
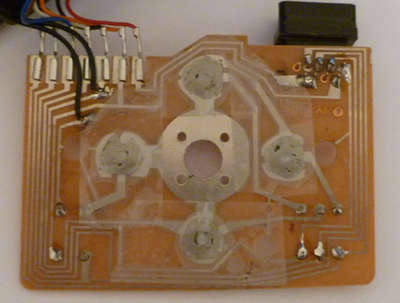
These were the cheapest and worst design around. The switches are made of small curved pieces of metal that were taped directly onto the circuit board. As can be seen on the JY-2 below, the tape tends to fall apart and in this case, it looks like some moisture has got in around one of the contacts.
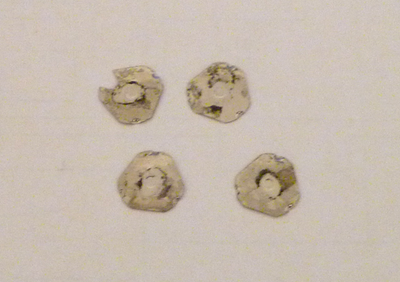
Remove the tape completely and you should be left with four Pods. Although they might look pretty filthy, the under side is what's important and they are usually perfectly clean, so any cleaning done to these is purely cosmetic. However, sometimes these pods can get bent and loose their tension, ie: they don't click anymore.
Check each pod individually on a table top, that they still click when you push them. If one is broken, you can always swap it with one of the fire button pods (which ever fire button you don't use) to fix the problem. If two are broken, you might have a problem, because getting replacements for these pods is more or less impossible. Be careful when cleaning these, because they're very easy to bend and once they've been bent, they don't ever work properly again.
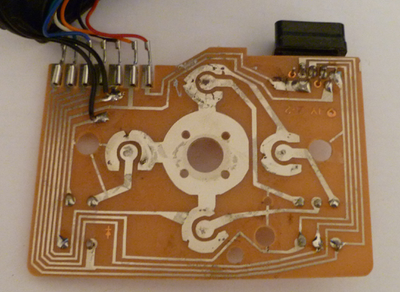
The circuit board beneath is a completely different story, you'll probably need to do some cleaning here using some contact cleaner and a cloth. Another problem that occurs often is that the pod has worn a hole through the PCB track. If this has happened, then placing the pod with a slightly different orientation should solve the problem. Don't try to fix the hole with solder, because you'll raise the height of the track and the button won't work properly at all afterwards. When everything has been cleaned, use some new tape to hold each pod in it's correct position. The pods have 3 contact points and three straight sides. Make sure none of the contact points are touching the track of the centre contact. When assembled correctly, one of the straight sides should bridge the track coming from the centre contact. You can test each pod with your finger before assembling the housing again.
The fire buttons in the joystick are exactly the same, check and clean these if necessary. Both fire buttons are switched in parallel and everyone has a favourite fire button, so you can use the other one as a spare for broken pods elsewhere.
When everything is cleaned and tested, you can re-assemble the joystick for a real test with your favourite game, but as I mentioned above, be careful not to trap any wires when re-assembling the joystick, the JY-2 wires can easily get trapped under the screw holes while putting the housing back together.
Open Micro-Switch Joysticks
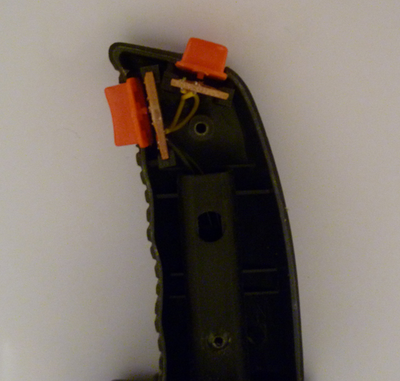
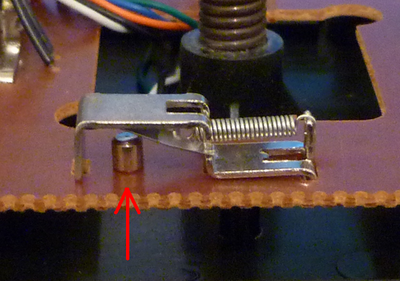
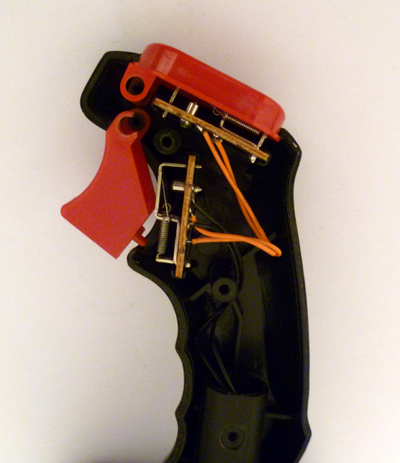
These joysticks were much more reliable and made an obvious click when moved. Inside you'll find four open micro-switches on the circuit board. The Plastic of the jostick grip pushes on the spring, which in turn flips a metal contact.
Certain makes of joystick had problems with the mechanics and it was possible to damage the spring if too much pressure was applied. If this happens, the spring may have a split in the middle. This is very difficult to repair without replacing the spring. Sometimes turning the spring over fixes the problem, but not always. If only one spring is damaged, I'd recommend once again, to use the spring from the second fire button.
Cleaning open micro-switch contacts is pretty easy. The pillar on the left and the thin metal arm above are the points that need to be cleaned. Some contact cleaner on a cotton bud or piece of cloth is enough to get these working again.
The fire buttons inside the grip are the same, clean these the same way if necessary. When re-assembling the grip, be careful of the wires in the centre column, it's very easy to rip these apart with the outer side that goes through the two holes.
Enclosed Micro-Switch Joysticks
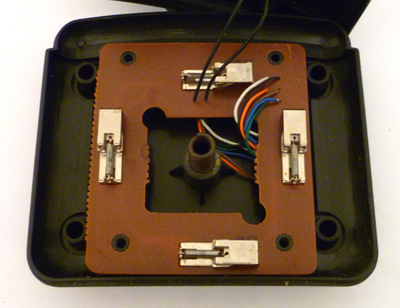
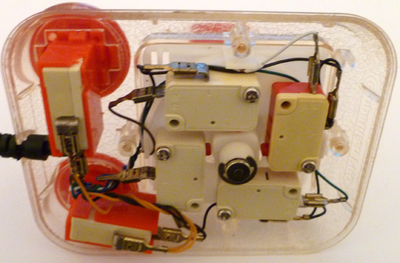
These joysticks had several advantages over the others. For a start, the fire buttons were in the base, so you don't need to open the grip to get at them. The closed micro-switches were also very difficult if not impossible to damage and they had push-on terminals, so they were easy to remove for cleaning. However, they did have one dis-advantage. Due to the switch being completely enclosed, any dirt that the switch produced couldn't escape and tended to accumulate on the contacts, so they clogged up relatively frequently and needed frequent cleaning.
When cleaning or fixing these joysticks, do it one switch at a time. If you remove all the switches in one go, you'll be left with a tangle of wires and no idea which wire went to which switch afterwards.
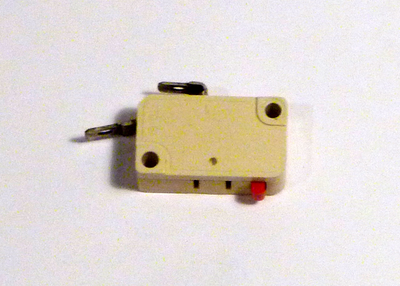
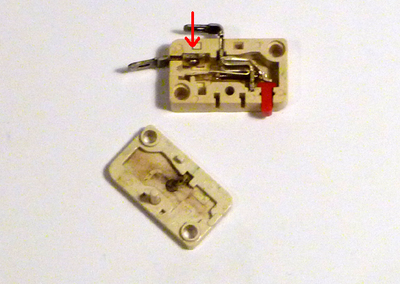
When you've removed a switch, by pulling the two contact wires off and removing the single screw, you'll be left with something like this. Luckily the switch is not a sealed unit, so carefully pushing a blade or even your fingernail into the split will open the switch.
Inside there's a slightly more complicated micro-switch, with a two armed actuator. Be careful, because all these small parts can easily fall out and aren't that easy to get back in (assuming you've found them again on that patterned carpet where they landed). The only important bit is the two contacts on the left hand side. Clean these with contact cleaner and re-assemble the switch.
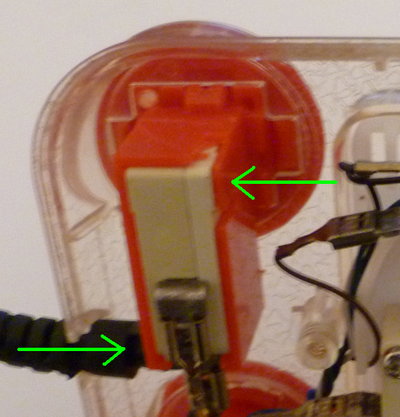
To remove the fire button switches there are two tabs, one at each end on opposite sides of the red casing seen above, you'll need to carefully push a small screwdriver between the red outer casing and the micro-switch to lift the tab, so that the switch can then be pulled out. The fire button micro-switches are identical to the others and should be cleaned as described above.
The Competition Pro is the only joystick where the designers even slightly considered cable management of any sort. On the outer side of each direction micro-switch, there is a small channel where the wires can be placed to keep them away from the screws, make use of these to avoid wire damage.
Bryce.
